Gross Margin Report (Extensions)
Overview
The Gross Margin Report looks at the percentage and profit margin based solely on sales and the cost of producing those sales. For financial reporting, it gives you a picture of how much revenue is left after deducting all the direct costs of producing and selling the product. Gross Margin is the “KING” and is a key indicator to watch for any business.
Installation
To install the Gross Margin Report extension:
- Navigate to Extensions → Extension Store.
- Find and select the extension Gross Margin Report.
- Click Install.
Usage
- Open the Gross Margin Report. You can do this from three locations:
- From My Extensions: Navigate to Extensions → My Extensions. Double-click Gross Margin Report and click Run Report.
- From the Inventory Module: Navigate to Inventory. Under the Reports section, select Additional Reports. When the pop-up appears click Gross Margin Report.
- From the Extension Store: Navigate to Extensions → Extension Store. Double-click Gross Margin Report and click Run Report.
- Select you desired Reporting Period.
- Configure Report Parameters:
- Display By: Determines the time intervals (Years, Quarters, Months, Weeks, or Days) used to group and display your data.
- Compare Against: Benchmarks your current data against Previous Years or the immediately Prior Periods.
- Number of Periods: Sets how many past intervals (e.g., last 3 months) to include in the report.
- Cost Type: Choose which cost basis to use: Last Cost (most recent), Historical Average, or Current Cost.
- Price Types: Determine the revenue basis: Average Sales Price, Last Price paid, or the standard Item Price.
- Sort Field: Organizes the results by specific metrics like Quantity, Cost, Item, Sales Price, Margin %, or Category.
- Run the Report.

This report contains all of the normal formatting, filtering and sorting that our standard reports offer.
Report Settings
Report settings allow users to customize the parameters and appearance of the Gross Margin Report.
General Settings
These settings control the scope and basic layout of the data presented:
- Preset/Period: Adjust or select the reporting period for the data.
- Display By: Determines the time intervals (Years, Quarters, Months, Weeks, or Days) used to group and display your data.
- Compare Against: Benchmarks your current data against Previous Years or the immediately Prior Periods.
- Number of Periods: Sets how many past intervals (e.g., last 3 months) to include in the report.
- Cost Type: Choose which cost basis to use: Last Cost (most recent), Historical Average, or Current Cost.
- Price Types: Determine the revenue basis: Average Sales Price, Last Price paid, or the standard Item Price.
- Sort Field: Organizes the results by specific metrics like Quantity, Cost, Item, Sales Price, Margin %, or Category.
Filter Settings
Use these filters to refine which transactions or items are included in your report. This ensures you are only analyzing the specific data set you need.
- Filter by Location: Limits the report to data from specific location or warehouseses.
- Filter by Qty: Excludes items that fall outside a specific range of units sold
- Filter by Sales Price: Restricts the results to items sold within a specific price bracket.
- Filter by Item: Focuses the report on a specific product or a group of selected products.
- Filter by Cost: Screens for items based on their individual unit cost, useful for identifying high-value inventory.
Header/Footer Settings
Used for document identification and branding:
- Set the Title, Header text, and Footer text (optional) for the printed or exported report.
Charts Settings
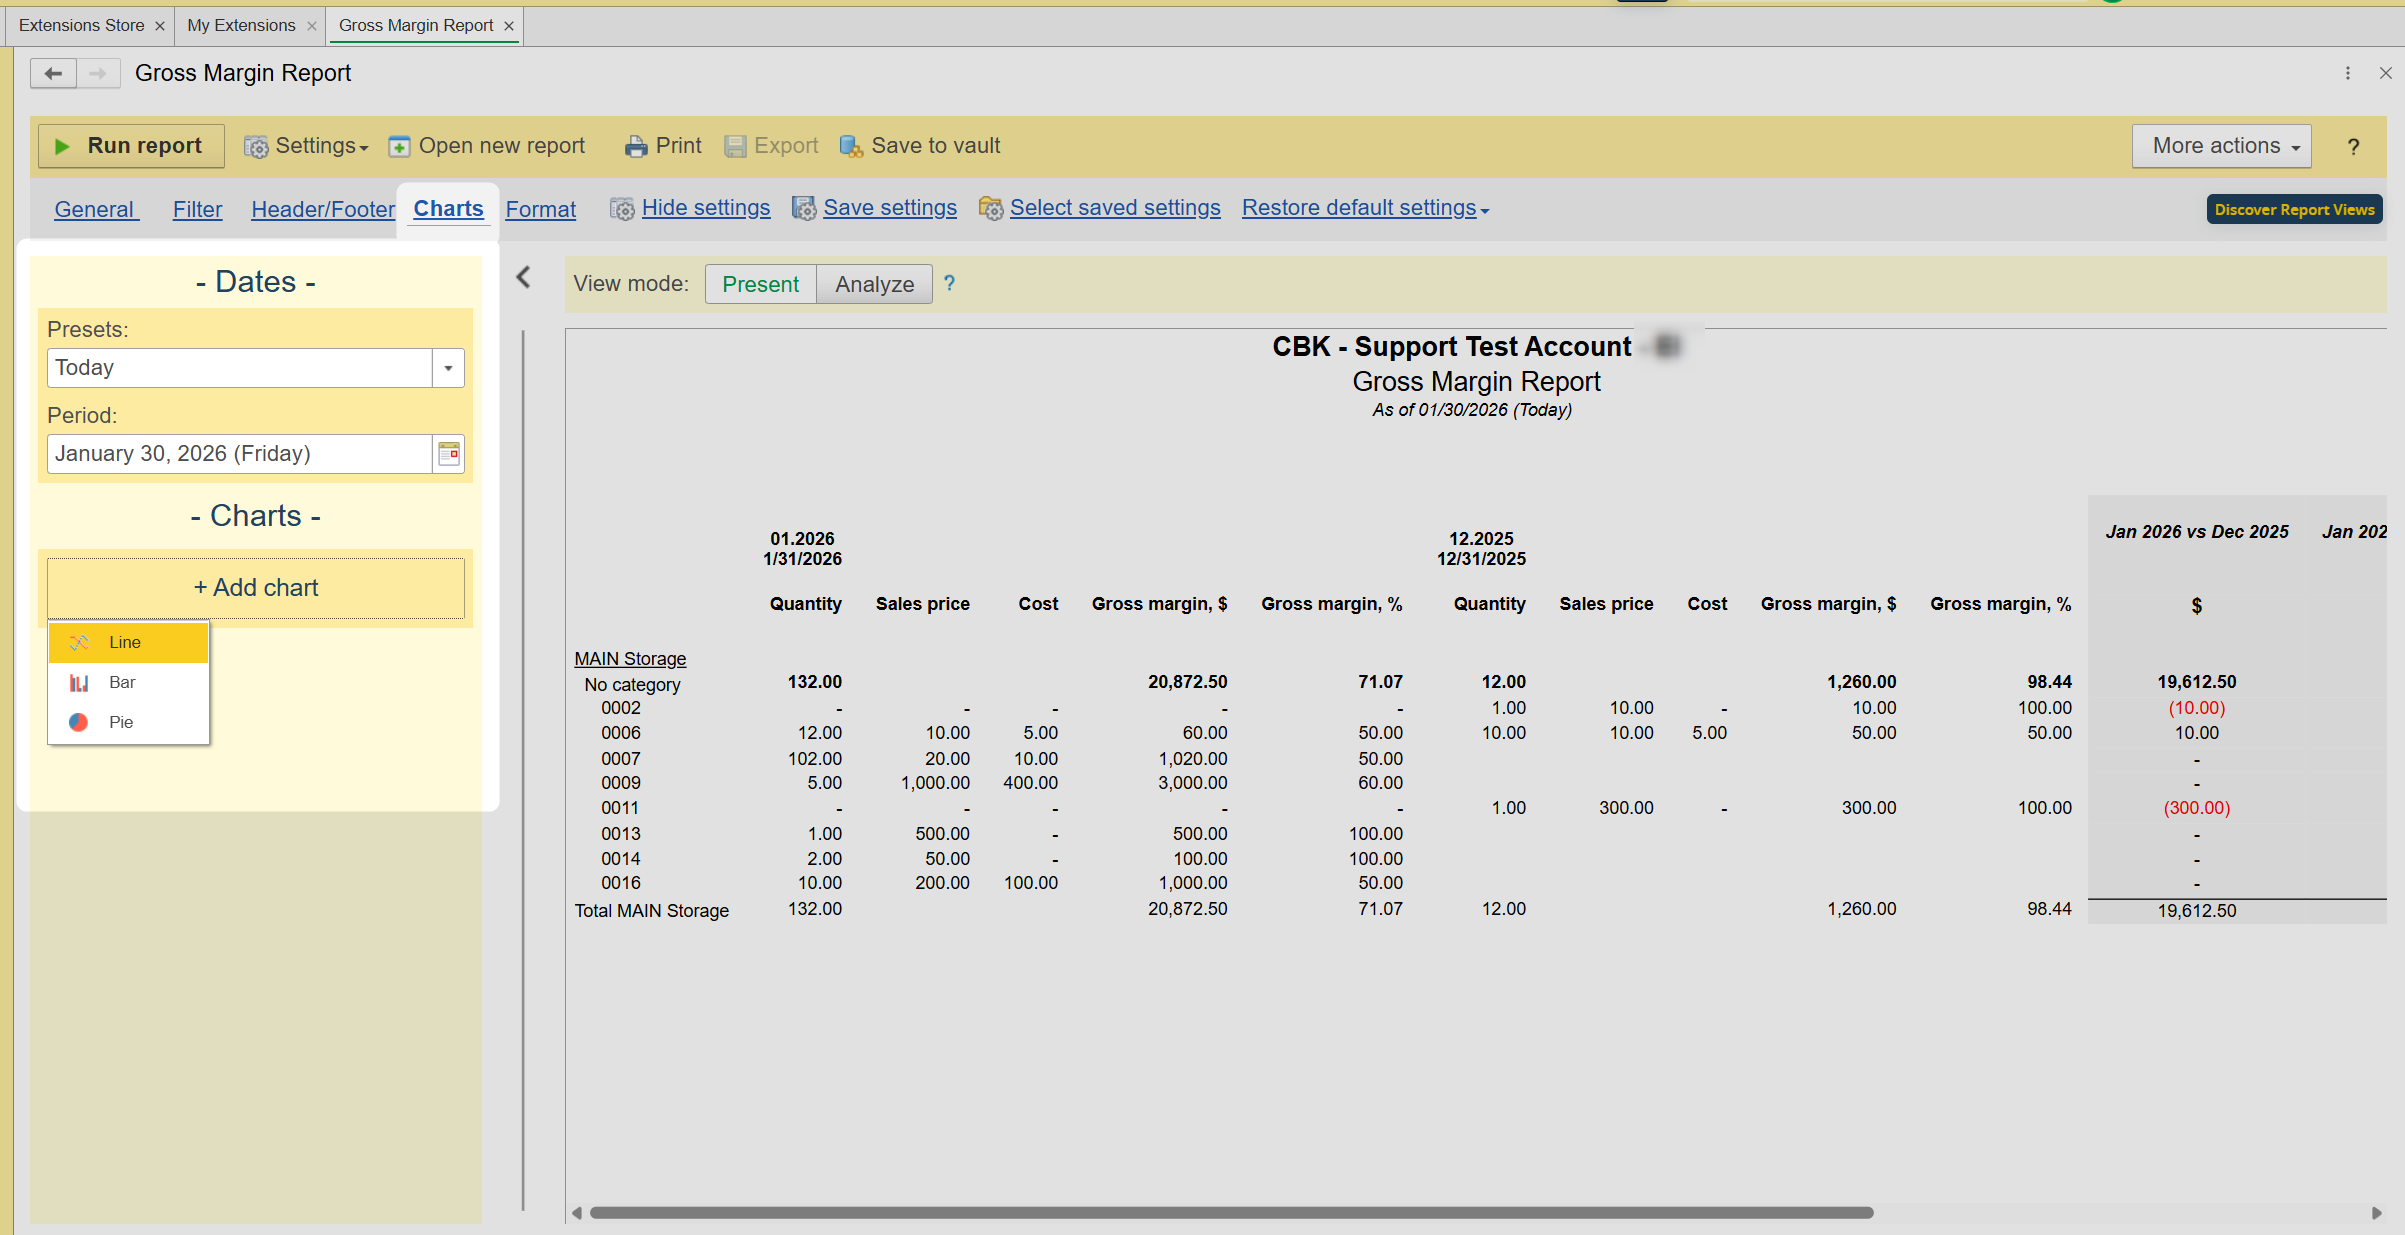
Optional addition of visual elements like a Line, Bar, or Pie Chart directly onto the report to illustrate trends.
Format Settings
Page Setup: These settings control the physical layout for printing:
- Adjust Paper Size
- Adjust the Margins
- Orientation (Portrait/Landscape).
- Choose to print in Color or Black & White.
- Set Pages per Sheet
- Set the Scaling for print optimization.
Format Numeric Field: Controls how numbers appear in columns:
- Increase or decrease the Decimal Precision.
- Set Display Value for Zeroes (e.g., -, Zero, or 0.00).
- Define Negative Number Presentation (e.g., (1.1), -1.1, or - 1.1).
- Option to display negative numbers in RED.
Command Buttons
These buttons provide direct actions related to managing, viewing, printing, or distributing the report configuration and output:
- Run Report: Generates the report based on the currently selected settings and view mode.
- Settings Drop-down:
- Hide Settings: Collapses the entire settings panel from view.
- Save Settings: Saves the current configuration to your user account with a custom name for later use.
- Select Saved Settings (Load): Loads a previously saved report configuration.
- Restore Default Settings: Reverts all report options back to the system default values.
- Open New Report: Opens a new, blank Gross Margin Report tab/window.
- Print: Sends the currently viewed report configuration to a connected printer.
- Export: Converts the report output to various file types (PDF, XLSX, DOCX, etc.). Note: This button is only enabled when the report is in Analyze View Mode.
- Send via Email: Attaches the report output and prepares an email for distribution.