General Ledger Report
A General Ledger Report is a comprehensive summary of all financial transactions posted to every account (like cash, sales, inventory, etc.) within a specific date range. By default, the General Ledger Report displays the transaction number, Company (Customer/Vendor Name), Document Memo, Split Account, Debit and Credit Amount, and the Balance.
Running a General Ledger Report
To run a General Ledger Report in CustomBooks™:
- Navigate to Reports > General Ledger or navigate to Accounting > under Reports section, select General Ledger.
- Select the Preset or Reporting Period.
- Click Run Report.
Report View Modes and Report Levels
Report View Modes
The General Ledger Report offers two primary modes tailored for different needs:
- Present Mode: Optimized for quick viewing and formal presentation (e.g., PDF export). It provides a clean, high-level summary showing totals and variances, with formatting locked to the highest report level.
- Analyze Mode: Designed for detailed inspection and editing of the data. This is where you can drill down into transaction details, export the report, change formatting, and access all settings.
Report Levels
You can control the detail displayed in the report using Report Levels. The Present View Mode always defaults to showing only the highest report level.
There are two report levels available on the General Ledger Report:
- Report Level 1: Displays only the general ledger accounts, along with their total debit, total credit, and total balances. This is the summary view.
- Report Level 2: Displays the individual transactions posted to the accounts. This detailed view includes information such as the related company (customer/vendor), document memo, split account, specific debit amount, credit amount, and running balance.
Report Settings
Report settings allow users to customize the content and appearance of the General Ledger Report.
General Settings
These settings control the scope and basic layout of the data presented:
- Accounting Method: Select the accounting reporting method (Accrual or Cash). Note: The default reporting method is whatever method is selected in the main Accounting Settings.
- Preset/Period: Adjust or select the reporting period for the data.
- Show Hierarchy: Show/Hide the organizational structure (e.g., grouping accounts under main categories like Assets, Liabilities, Equity).
- Show Zero/Inactive Accounts: Option to Show/Hide accounts that have zero balances or are marked as inactive.
- Account Presentation: Choose how accounts are displayed: Account Description Only, Account Code Only, or Account Code and Description.
- Sort Fields: Define the primary sorting criteria, such as by opening/closing balance, debit/credit totals, Account Name, or Account Type.
Filter Settings
Filters refine the transactions or accounts included in the report:
- Filter by Class or Project.
- Filter by specific Account or Account Type.
- Filter by specific Companies (Customers/Vendors)
- Choose to view Customers Only or Vendors Only.
Header/Footer Settings
Used for document identification and branding:
- Set the Title, Header text, and Footer text (optional) for the printed or exported report.
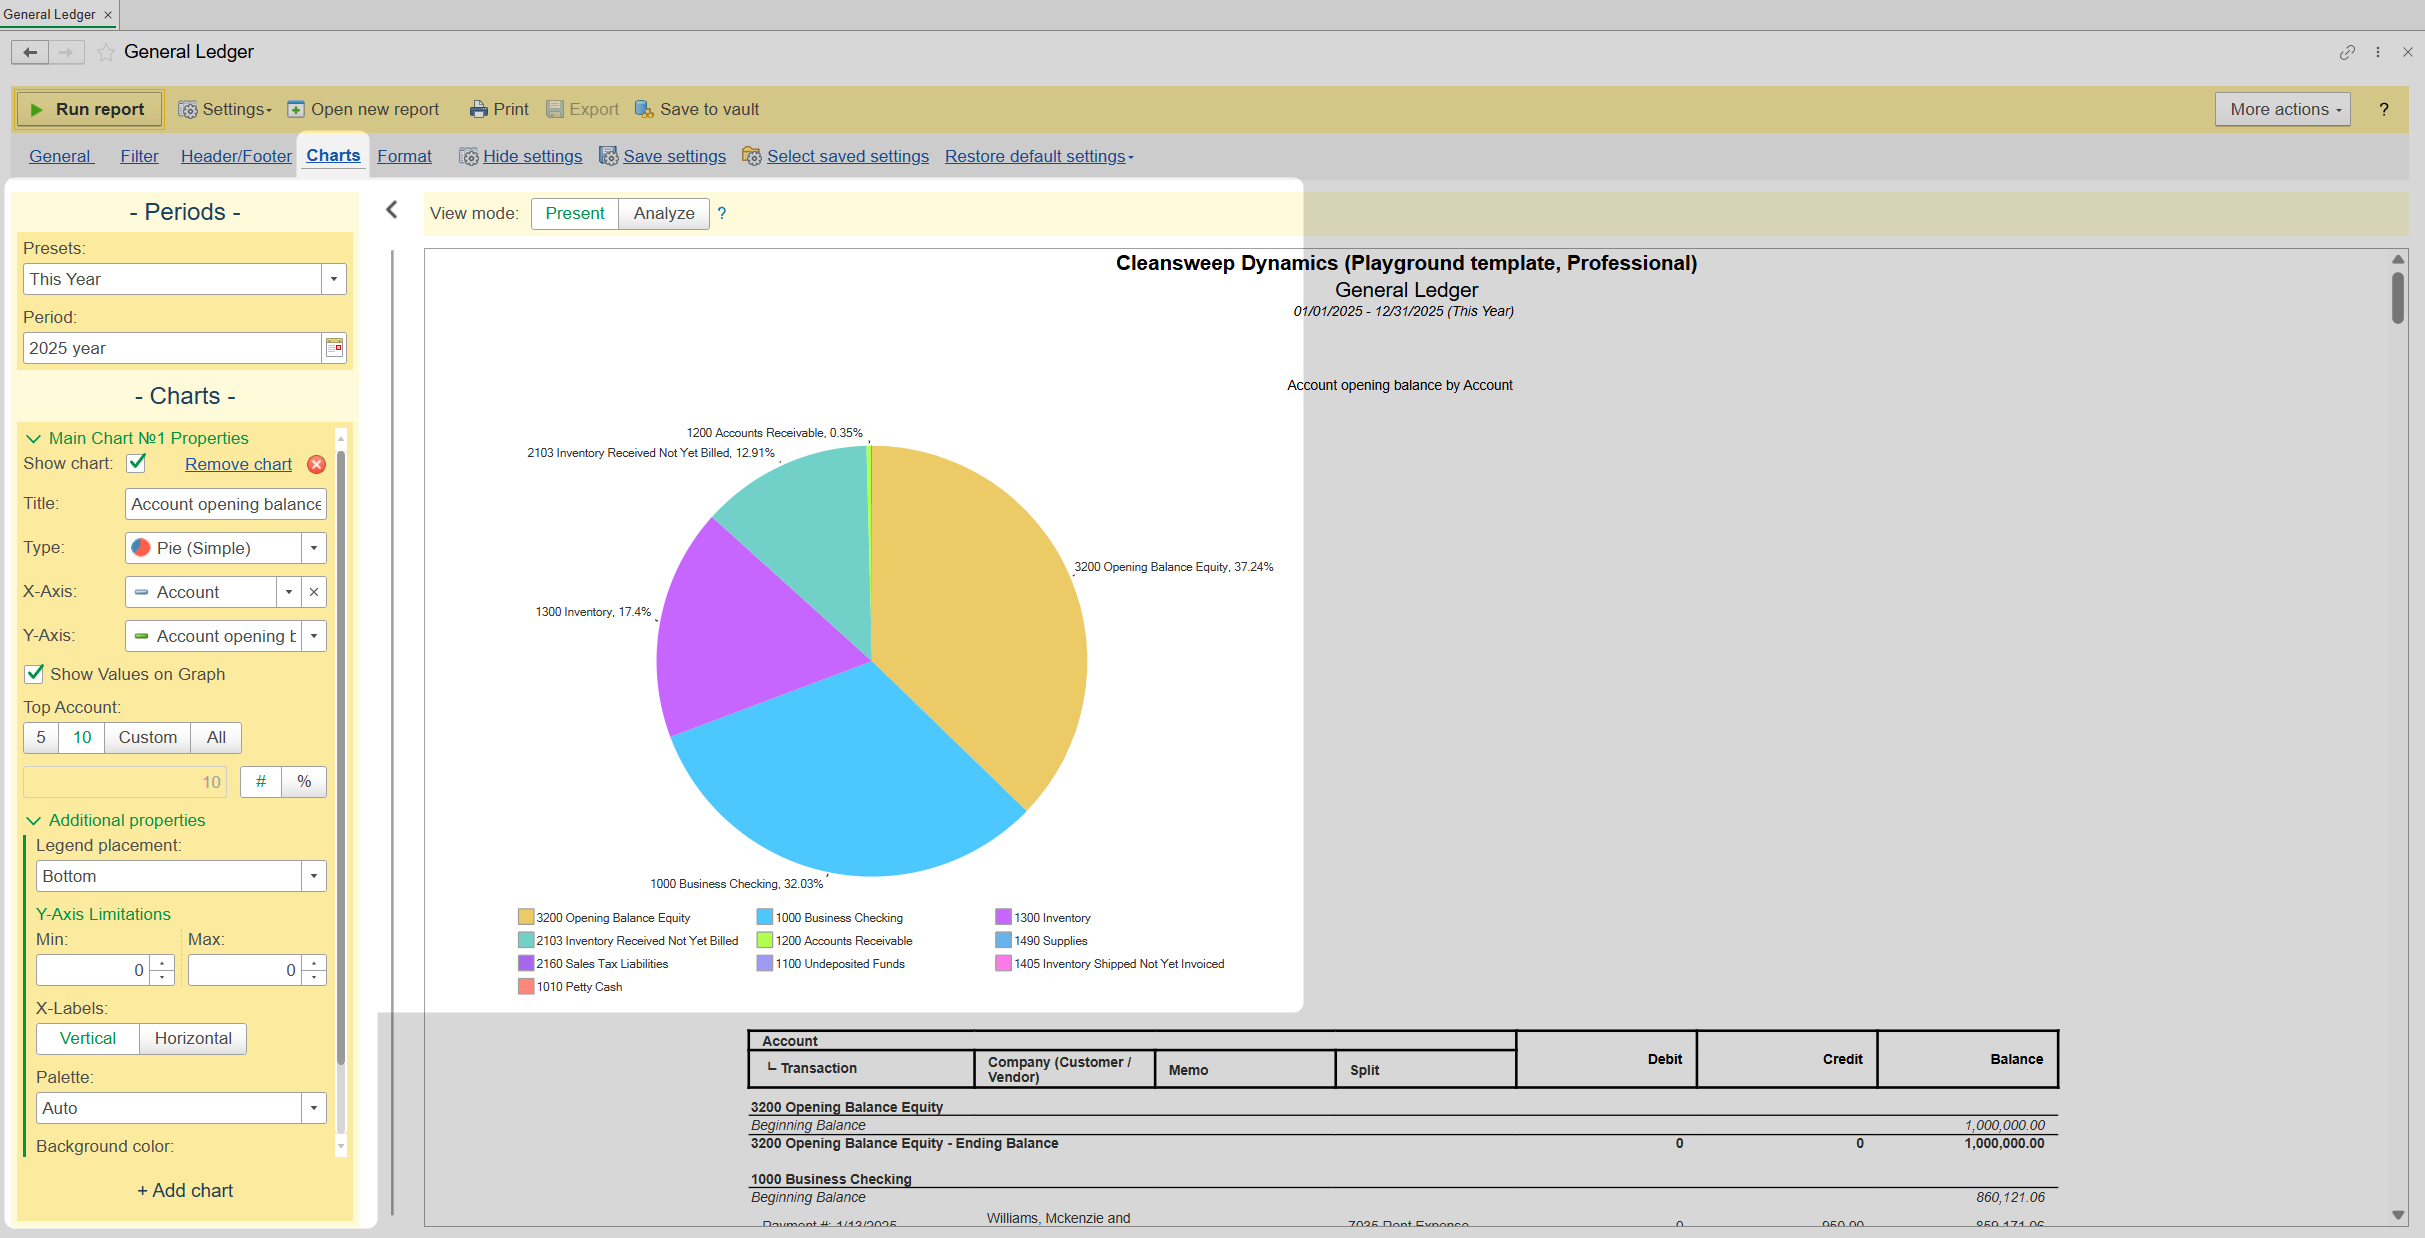
Charts Settings
Optional addition of visual elements like a Line, Bar, or Pie Chart directly onto the report to illustrate trends.
Format Settings
Page Setup: These settings control the physical layout for printing:
- Adjust Paper Size
- Adjust the Margins
- Orientation (Portrait/Landscape).
- Choose to print in Color or Black & White.
- Set Pages per Sheet
- Set the Scaling for print optimization.
Format Numeric Field (NOT AVAILABLE on the General Ledger Report): Controls how numbers appear in columns:
- Increase or decrease the Decimal Precision.
- Set Display Value for Zeroes (e.g., -, Zero, or 0.00).
- Define Negative Number Presentation (e.g., (1.1), -1.1, or - 1.1).
- Option to display negative numbers in RED.
Command Buttons
These buttons provide direct actions related to managing, viewing, printing, or distributing the report configuration and output:
- Run Report: Generates the report based on the currently selected settings and view mode.
- Settings Drop-down:
- Hide Settings: Collapses the entire settings panel from view.
- Save Settings: Saves the current configuration to your user account with a custom name for later use.
- Select Saved Settings (Load): Loads a previously saved report configuration.
- Restore Default Settings: Reverts all report options back to the system default values.
- Open New Report: Opens a new, blank General Ledger Report tab/window.
- Print: Sends the currently viewed report configuration to a connected printer.
- Export: Converts the report output to various file types (PDF, XLSX, DOCX, etc.). Note: This button is only enabled when the report is in Analyze View Mode.
- Send via Email: Attaches the report output and prepares an email for distribution.
Frequently Asked Questions
Question: How do I remove or hide the parameters in the report header? (e.g. Accounting Method, Show Inactive Accounts, Account Presentation, Class, Project, etc)
Answer: Show/Hide parameters in the report header by clicking the "Show/Hide Parameters" button (the eye icon) in the General and Filter Settings.
Question: Why can't I export the report? The Export button is grayed out.
Answer: It's because you are currently in Present View Mode. Select Analyze View Mode to enable the Export and Send button.
Question: I ran the report and tried to open the transactions, but the system won't let me. Nothing happens when I double-click any transaction.
Answer: To drill down into transaction details, you must be in Analyze View Mode. You can double-click to drill down and open the selected transaction, or you can right-click and select "Open Item."
Need help applying this to your business?
See how CustomBooks™ can support your accounting and inventory workflow
If you are evaluating CustomBooks™ or want help setting up workflows for your business, explore the product or schedule a conversation with our team.
Already using CustomBooks™? Explore the Knowledge Base or contact support for product help.
Related Articles
Statement of Cash Flows Report
A Statement of Cash Flows Report (also called a Cash Flow Statement) is a financial report that tracks the actual cash flowing into (inflows) and out of (outflows) a company over a specific period. It is one of the three main financial statements, ...Admin Panel: General Settings
Overview The General Settings in the CustomBooks™ Admin Panel allows you to configure fundamental system behaviors, ranging from how your currency is handled to the precision of your financial data. How to Access General Settings To modify these core ...Admin Panel: Accounting Settings
Overview The Accounting Settings page in the CustomBooks™ Admin Panel is the central hub for defining how your system handles financial data. Here, you can establish your core accounting method, define reporting parameters, map default system actions ...Balance Sheet Report
What is a Balance Sheet Report? A Balance Sheet Report is a financial statement that provides a summary of a company's assets, liabilities, and equity (owner's or shareholder's equity) as of a specific date. This report is one of the three core ...Gross Margin Report (Extensions)
Overview The Gross Margin Report looks at the percentage and profit margin based solely on sales and the cost of producing those sales. For financial reporting, it gives you a picture of how much revenue is left after deducting all the direct costs ...